Equation. (61) can also be written as
 |
(67) |
which can be arranged in the following form
 |
(68) |
As discussed above, the last term
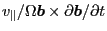 is usually ignored. Thus, the above
equation is written as
is usually ignored. Thus, the above
equation is written as
 |
(69) |
Define
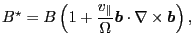 |
(70) |
which is related to
 defined in Eq. (17)
through
defined in Eq. (17)
through
 , then Eq.
(69) is written as
, then Eq.
(69) is written as
 |
(71) |
Define
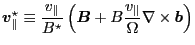 |
(72) |
Eq. (71) is written as
 |
(73) |
which agrees with Eqs. (8)-(14) in Todo's paper[4]. Note that in
this form of the guiding center drift, the curvature drift is included in
 (the second term in Eq. (72)).
Compared with Eq. (66), Eq. (73) is more accurate because
it does not use the approximation that
(the second term in Eq. (72)).
Compared with Eq. (66), Eq. (73) is more accurate because
it does not use the approximation that
 . The numerical results form my numerical code indicate
that Eq. (73) can conserve the toroidal angular momentum more
accurately than Eq. (66).
. The numerical results form my numerical code indicate
that Eq. (73) can conserve the toroidal angular momentum more
accurately than Eq. (66).
YouJun Hu
2014-05-19